Have you ever wanted to grow more Aloe Vera without the hassle of soil propagation? Whether you're a beginner or an indoor plant enthusiast looking for a simple way to expand your collection, propagating Aloe Vera in water offers a rewarding and straightforward method. Not only is it less messy, but it also allows you to monitor root growth closely, giving you a sense of control and success with every step. In this guide, I’ll walk you through the easy steps of propagating Aloe Vera in water, troubleshoot common issues, and share tips for keeping your new plants healthy. With patience and gentle care, you'll soon enjoy lush Aloe Vera plants thriving in your home—perfect for both decoration and natural healing.
Section 1: Understanding Aloe Vera Propagation in Water
Visual identification of healthy offsets
Aloe Vera naturally produces offsets—small baby plants that grow from the base of the main plant. When selecting offsets for water propagation, look for healthy, firm, and plump pups with several leaves. Avoid any with yellowing, mushy parts, or signs of disease.
Benefits of water propagation vs soil
Propagating Aloe Vera in water has several advantages:
- Easier to observe root development
- Less risk of overwatering or root rot
- Quicker root growth in some cases
- Less mess and immediate visual feedback
However, transitioning your Aloe Vera from water to soil later on can help establish a more mature, resilient plant if desired.
Section 2: Diagnosing Common Propagation Problems
Cause 1: Using unhealthy or over-mature offsets
If your offsets are too old or unhealthy, they might not root well. Always choose young, healthy pups with vibrant leaves.
Cause 2: Improper cutting or handling
Rough handling or incorrect cuts can damage the plant, leading to rot or failure to root. Use clean, sharp scissors or pruning shears and handle gently.
Cause 3: Water quality or environment issues
Stagnant or dirty water, unsuitable temperature, or low light can hinder root growth. Use fresh, filtered water and keep the environment stable.
How to tell which problem is affecting your Aloe Vera
Signs of trouble include rotting or moldy offsets, no root development after several weeks, or the plant turning yellow. Carefully examine your plant and environment to identify the cause.
Section 3: Step-by-Step Propagation and Care
Preparing healthy offsets
- Select your offsets: Look for pups with at least a few leaves and a healthy appearance.
- Remove from the mother plant: Gently dig around the base or carefully twist off the pup, ensuring some roots or a small stem are attached.
- Let it callus: Allow the cut end to dry and callus over for 1-2 days in a shaded, airy spot. This helps prevent rot when placed in water.
Proper cutting and rooting technique
- Cut with clean tools: Use sterilized scissors or pruning shears.
- Trim if necessary: Remove any damaged or rotting leaves or roots.
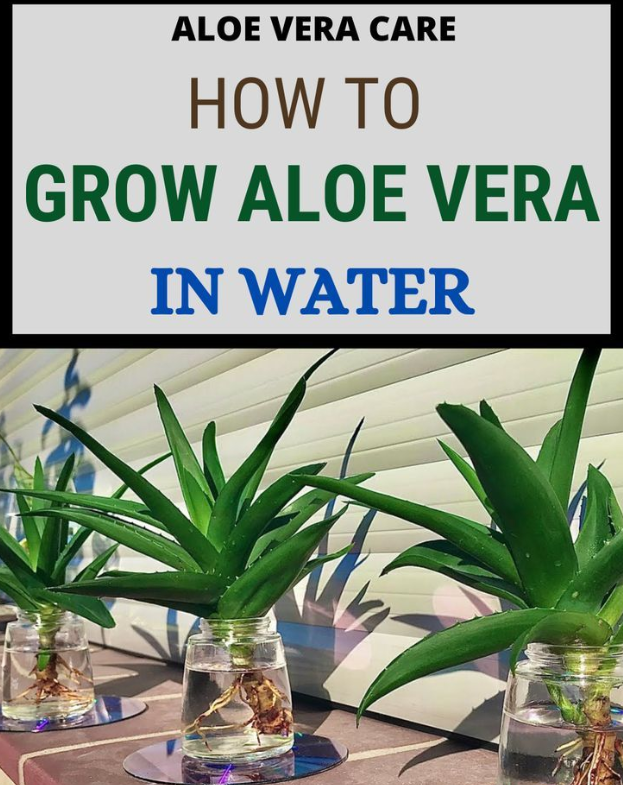
- Place in water: Submerge the base of the offset in a clean jar filled with filtered or distilled water. Ensure only the cut or root area is underwater, leaving the leaves dry.
Setting up water and environment
- Choose the right container: Use a clear glass or jar that allows you to monitor roots.
- Position properly: Place the container in bright, indirect sunlight.
- Maintain water quality: Change the water every 3-4 days to prevent stagnation and bacteria buildup.
- Temperature: Keep the environment warm (65-75°F / 18-24°C) for optimal growth.
Monitoring growth and troubleshooting root issues
- Root development: Expect roots to appear within 2-4 weeks.
- Healthy roots: White or light-colored, firm roots are signs of good health.
- Troubleshooting: If roots rot or mold appears, replace water immediately, trim affected roots, and ensure proper drying and cleaning.
Transitioning rooted Aloe Vera to soil (optional)
Once roots are about 2-3 inches long, you can transfer your Aloe Vera to soil:
- Use well-draining succulent or cactus mix
- Plant at the same depth as in water
- Water sparingly and keep in bright, indirect light
Section 4: Prevention and Maintenance
Use clean tools and containers
Always sterilize your scissors, pruning shears, and jars before use to prevent infections.
Change water regularly
Fresh water prevents bacteria buildup and promotes healthy root growth. Change every 3-4 days.
Provide appropriate light and temperature
Place your propagating Aloe Vera in bright, indirect sunlight and maintain a warm, stable environment.
Avoid overwatering or water stagnation
Too much water or stagnant water can cause rot. Ensure your container has good airflow, and don’t leave the plant sitting in water for too long after roots develop.
Conclusion
Propagating Aloe Vera in water is a simple, satisfying process that can turn your indoor garden into a thriving oasis. By selecting healthy offsets, handling them carefully, and providing the right environment, you’ll enjoy watching your Aloe Vera grow roots and eventually flourish into a beautiful new plant. Remember, patience is key. With consistent care, your Aloe Vera will reward you with lush, healing leaves—perfect for home remedies or decorative purposes. Start with a healthy offset today, and watch your Aloe Vera journey blossom!
FAQ
Q: How long does it take for Aloe Vera to root in water?
A: Typically, Aloe Vera offsets take about 2 to 4 weeks to develop healthy roots in water. Factors such as water quality, temperature, and light can influence the rooting time.
Q: Can I transfer Aloe Vera rooted in water directly to soil?
A: Yes, once the roots are about 2-3 inches long, you can transplant your Aloe Vera into well-draining soil. Be gentle during the transfer, and water lightly after planting.
Q: What should I do if my Aloe Vera rot or mold in water?
A: Remove the affected plant immediately, trim away any rotted roots or leaves, and change the water with fresh, filtered water. Ensure your container is clean, and keep the plant in a bright, well-ventilated spot to prevent further issues.
Embark on your Aloe Vera propagation journey today, and enjoy the satisfaction of growing your own healthy plants with just water and a little patience!