Are you worried about your beloved Spider Plant showing signs of distress? Noticing that the roots might be turning brown or mushy? Don't worry—you're not alone. Root rot is a common issue among indoor plant enthusiasts, especially with lush, popular species like the Spider Plant. Fortunately, with the right knowledge and care, you can nurse your plant back to health and prevent future root problems. This comprehensive guide will help you identify root rot, diagnose its cause, treat your plant effectively, and adopt preventive measures to keep your Spider Plant thriving. Whether you’re a beginner or an experienced plant parent, understanding these steps can save your plant and bring joy back into your indoor gardening.
Section 1: Understanding the Problem
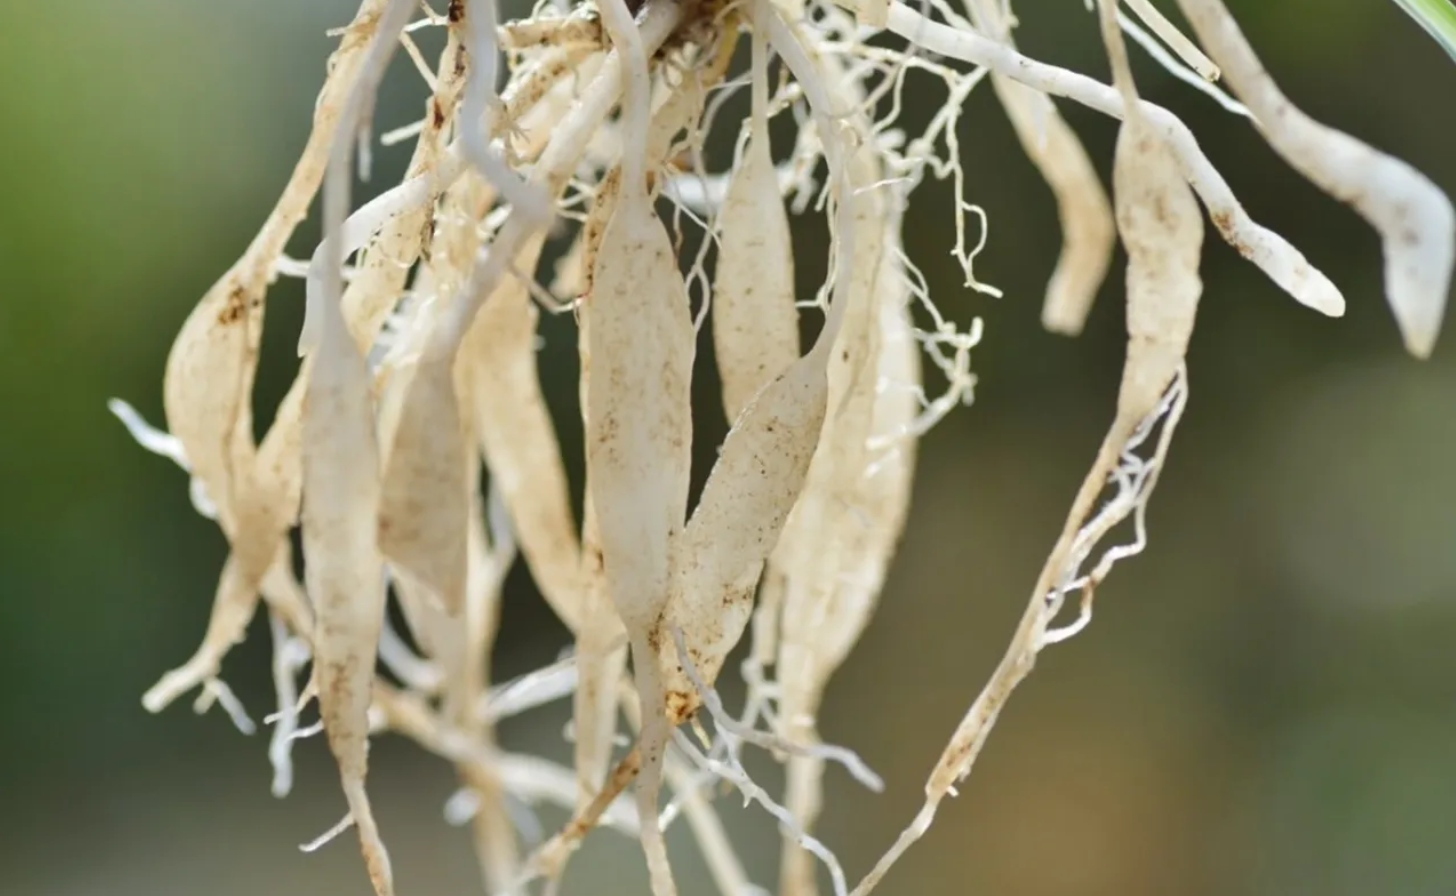
Visual Identification of Root Rot
The first step in fixing Spider Plant root rot is recognizing the symptoms. Healthy roots are firm, white or tan, and smell fresh. When root rot occurs, you'll notice:
- Mushy, discolored roots: Roots becoming soft, brown, or black.
- Foul smell: A distinct, unpleasant odor emanating from the soil or the roots.
- Wilting or yellowing leaves: Above-ground signs of root distress.
- Stunted growth or dieback: The plant may stop growing or lose its vibrant appearance. Tip: Carefully remove your Spider Plant from its pot and gently inspect the roots for these signs.
Common Causes Overview
Root rot typically results from overwatering and poor soil conditions. Key culprits include:
- Excess water around roots, leading to waterlogged soil.
- Poor drainage due to containers without drainage holes or compacted soil.
- High humidity environments that trap moisture around roots.
- Inadequate airflow around the plant, preventing proper evaporation. Understanding these causes is crucial for diagnosing and fixing the problem effectively.
Section 2: Diagnosing the Exact Cause
Step 1: Check the Soil Moisture
Stick your finger into the soil about an inch deep. If it feels soggy or water is standing, overwatering is likely the main issue.
Step 2: Examine the Pot and Soil
- Look for drainage holes: Are they clear and functional?
- Inspect soil texture: Is it compacted or heavy? Such soil prevents proper aeration.
Step 3: Assess Environmental Conditions
- Is the room overly humid or poorly ventilated?
- Is the plant located in a spot with limited airflow or excess moisture?
Step 4: Identify the Root Problem
- Cause 1: Overwatering leading to waterlogged soil — roots remain constantly wet, promoting rot.
- Cause 2: Poor drainage or compacted soil — water cannot escape, creating stagnant conditions.
- Cause 3: Excess humidity or inadequate airflow — fosters fungal growth and root decay. Tip: To confidently identify the cause, inspect the roots after removing the plant. Healthy roots are firm and white; rotten roots are mushy and discolored.
Section 3: Treatment Solutions
Step 1: Immediate Action
- Gently remove your Spider Plant from its pot.
- Rinse the roots carefully under lukewarm water to wash away soil and fungus.
- Use sterilized scissors or pruning shears to cut away all rotten, mushy roots. Remember to disinfect your tools before and after use.
Step 2: Applying Natural Remedies
- Prepare a hydrogen peroxide solution (1 part hydrogen peroxide to 3 parts water).
- Dip the remaining healthy roots into this solution to help eliminate fungi and bacteria.
- Allow the roots to dry briefly before repotting.
Step 3: Repot in Fresh, Well-Draining Soil
- Choose a pot with drainage holes to prevent future water accumulation.
- Use a light, airy soil mix designed for indoor plants, such as one enriched with perlite or coarse sand for good drainage.
- Make sure the pot is just the right size; avoid overly large containers that retain excess moisture.
Step 4: Implement Long-Term Care
- Water wisely: Allow the top inch of soil to dry out before watering again.
- Adjust watering schedule: Bottom watering—placing the pot in a shallow dish of water and letting it soak from the bottom—is recommended.
- Improve airflow: Place your plant in a well-ventilated spot.
- Maintain appropriate humidity: Aim for moderate humidity levels; avoid excessive moisture buildup.
Step 5: Monitor Recovery
Observe your Spider Plant closely for signs of new, healthy root growth and overall vigor. Be patient; recovery may take several weeks with consistent care.
Section 4: Prevention Tips
1. Adjust Watering Routines
- Bottom watering is preferred to prevent overwatering.
- Water only when the top inch of soil is dry.
- Use a moisture meter if necessary to gauge soil moisture accurately.
2. Ensure Well-Draining Soil and Proper Pot Selection
- Always plant in pots with drainage holes.
- Use a high-quality, airy soil mix designed for houseplants.
3. Maintain Humidity and Airflow
- Avoid placing your Spider Plant in overly humid locations like bathrooms.
- Use fans or open windows periodically to promote air circulation.
4. Regular Inspection
- Check your plant’s roots and soil every few months.
- Remove any debris or dead leaves that may contribute to fungal growth.
Conclusion
Recap: Recognizing the signs of root rot early, diagnosing whether overwatering, poor drainage, or environmental factors are causing the problem, and taking prompt, effective treatment steps are essential. With a little patience and consistent care, your Spider Plant can recover from root rot and flourish again. Remember: Prevention is always better than cure. Adopt proper watering practices, ensure adequate drainage, and monitor your plant regularly to maintain healthy roots and vibrant foliage. Get started today—check your Spider Plant, and give it the care it deserves. Your indoor garden will thank you!
FAQ
Q: How long until I see improvement after treatment?
A: Typically, you can expect to see signs of recovery within 2 to 4 weeks. New root growth will start gradually, and healthy foliage will reappear as the plant regains strength. Consistent care is essential for a full recovery.
Q: Is it always necessary to prune all affected roots?
A: Yes, removing all rotten roots is crucial to prevent the spread of fungal infection. Use sterilized tools and ensure all decayed tissue is cut away. Healthy roots might be few but will regenerate if given proper conditions.
Q: Can root rot be prevented completely with proper care?
A: While perfect prevention is challenging, adopting consistent watering routines, using well-draining soil, and providing good airflow significantly reduces the risk of root rot. Regular inspections help catch issues early before they become severe.
By following these tips, you’ll become confident in diagnosing, treating, and preventing root rot, ensuring your Spider Plant remains a healthy, beautiful addition to your indoor space. Happy gardening!