Struggling with browning tips on your Peace Lily? Don't worry—this is a common issue many plant parents face. Browning leaf tips can be unsettling, but with a little patience and some simple adjustments, you can restore your plant’s health and vitality. This guide will walk you through understanding why browning occurs, diagnosing the root cause, and applying practical solutions to bring your Peace Lily back to lush, vibrant life.
Understanding the Problem
Visual Identification of Browning Tips
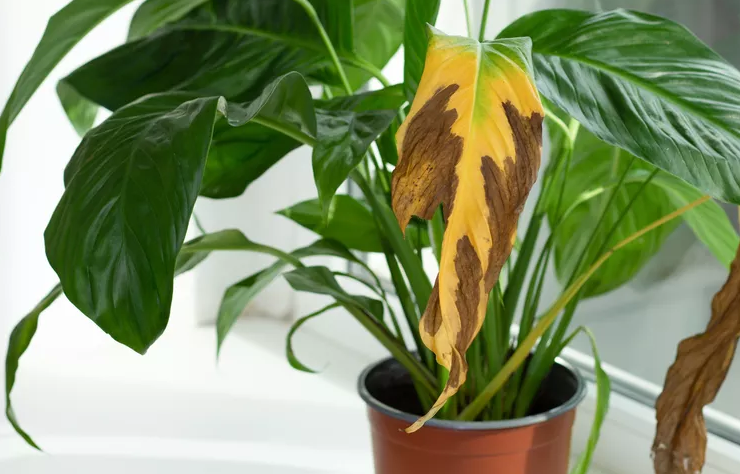
First, let’s learn how to recognize brown tips on your Peace Lily. Typically, the leaf edges turn from vibrant green to brown or straw-colored, often appearing dry, crispy, or rough. Sometimes, the tips may be slightly curled or show small brown patches near the edges. These signs are usually localized, affecting the leaf margins rather than the entire leaf tissue.
Common Causes: Watering Issues, Humidity, Salt Build-up
Several factors can lead to browning tips:
- Over- or Under-Watering: Both extremes can cause stress, resulting in dry, brown tips.
- Low Humidity: Peace Lilies thrive in humid environments; dry indoor air can cause tips to dry out.
-
Salt or Mineral Buildup: Excess salts from fertilizers or tap water can accumulate in the soil, damaging roots and leaf tips.
-
Nutrient Deficiencies: Particularly potassium deficiency can manifest as leaf tip browning.
- Environmental Stress: Drafts, sudden temperature changes, or direct sunlight can also contribute. Understanding what’s causing the browning helps you choose the right solution.
Diagnosing the Exact Cause
Cause 1: Watering Problems – Signs of Overwatering or Underwatering
- Overwatering: Soil feels consistently wet, with poor drainage or a musty smell. Roots may look brown or mushy.
- Underwatering: Soil is very dry, the plant looks wilted, and leaf tips become crispy and dry.
Cause 2: Low Humidity – How Dry Indoor Air Affects Leaf Tips
- Check the indoor humidity with a hygrometer; below 40%, especially during winter, can cause leaf tips to brown.
- Brown tips may be more noticeable on newer leaves or ones near heat vents.
Cause 3: Nutrient or Salt Buildup – Impact of Salts from Fertilizers
- Excess fertilizer can cause salt accumulation, leading to leaf tip burn.
- Signs include a crusty white residue on the soil surface or around the pot’s edges.
How to Tell Which Cause Applies to Your Plant
- Check soil moisture: Use your finger or a moisture meter.
- Observe the environment: Is your home particularly dry? Are there drafts? Is the plant receiving direct sunlight?
- Inspect the soil: Look for salt deposits or crusts.
- Assess watering routine: Are you watering too frequently or irregularly? Once you identify the cause, you can apply targeted remedies.
Treatment Solutions
Immediate Actions: Adjusting Watering Habits & Increasing Humidity
- Water appropriately: Allow the top inch of soil to dry out before watering again. Water thoroughly, ensuring excess drains out.
- Increase humidity: Use a humidifier nearby, place the pot on a humidity tray with pebbles and water, or frequently mist the leaves with water.
Long-term Treatment: Repotting & Fertilizing Properly
- Repot if necessary: Use well-draining soil formulated for houseplants. Remove any salt crusts gently from the soil surface.
- Flush the soil: If salt buildup is suspected, flush the root zone with distilled water to wash away excess salts.
- Fertilize wisely: During the growing season, apply a balanced, water-soluble fertilizer diluted to half strength every 4-6 weeks. Avoid over-fertilizing to prevent salt buildup.
Monitoring During Recovery
- Keep an eye on your plant's response over the next few weeks.
- Trim off severely damaged or brown tips if they detract from the plant’s appearance—this encourages new, healthy growth.
Prevention Tips
Establish a Consistent Watering Schedule
- Water only when the top inch of soil feels dry.
- Use room temperature water to avoid shocking the roots.
Maintain Optimal Humidity
- Utilize room humidifiers, especially in winter.
- Mist the leaves regularly or set up a pebble tray.
Use Balanced, Pet-Safe Fertilizers
- Choose fertilizers specifically designed for Peace Lilies or indoor foliage plants.
- Follow the recommended dosage and frequency to prevent nutrient excess.
Keep Environmental Factors in Check
- Avoid placing your Peace Lily near drafts, heating vents, or direct sunlight.
- Maintain a steady room temperature between 65-80°F.
Conclusion
Addressing browning tips on your Peace Lily involves understanding the root causes, diagnosing carefully, and applying specific remedies. By adjusting your watering habits, increasing humidity, using proper fertilization, and protecting your plant from environmental stress, you’ll likely see an improvement in its health and appearance. With dedicated care and patience, your Peace Lily can recover quickly and continue to grace your space with its lush, green foliage. Start implementing these tips today, and enjoy the process of helping your beloved plant thrive again.
FAQ
Q: How long until I see signs of recovery after treatment?
A: Typically, you should begin noticing improvements within 2-4 weeks of adjusting watering and humidity. New growth will be healthier, and the brown tips may stop spreading.
Q: Can brown tips go away completely, or do I need to prune them?
A: Brown tips that are crispy or dry generally won’t revert to green. It's best to prune them with clean scissors to improve appearance and encourage healthy new growth.
Q: Are there specific fertilizers that help prevent browning tips?
A: Yes, use a balanced, slow-release, or water-soluble fertilizer formulated for houseplants. Look for one with micronutrients like potassium, which helps prevent tip burn, and ensure it's pet-safe if you have pets at home.
Remember: Your Peace Lily is resilient. With consistent care and attention, you’ll soon see its beautiful, glossy leaves return, filling your space with natural elegance. Happy planting!